Voltage drop is the loss of electrical pressure that happens as current travels through a cable. Some drop is normal, but too much of it can overheat cables, damage equipment, and fail electrical compliance checks.
If you're an electrician, designer, or engineer working to AS/NZS 3000:2018 and AS/NZS 3008:2017, knowing how to calculate voltage drop correctly isn't optional. It directly affects the cable size you choose, the safety of the installation, and whether your design passes inspection.
This guide walks through exactly how to calculate voltage drop, the formulas to use, real worked examples, the Australian Standards limits you need to meet, and the mistakes that trip up even experienced electricians.
What Is Voltage Drop?
Voltage drop is the reduction in voltage between the point where power enters a circuit and the point where it's used. It happens because every cable has resistance (and, in AC circuits, reactance), which "uses up" a small amount of voltage as current flows through it.
The longer the cable run and the higher the current, the greater the voltage drop. If it's too large:
- Motors draw more current and run hotter, shortening their lifespan
- LED drivers and electronic equipment can flicker or malfunction
- Lighting appears dim, especially at the end of long circuits
- Cables can overheat, creating a fire risk
- The installation may fail to meet AS/NZS 3000 compliance requirements
This is why voltage drop is one of the key factors that determines the minimum cable size for any installation.
Maximum Allowable Voltage Drop
Before calculating anything, you need to know the limit you're designing to.
Under Clause 3.6 of AS/NZS 3000:2018, the voltage drop between the point of supply and any point in a low-voltage electrical installation must not exceed:
- 5% of the nominal supply voltage in most cases
- 7% where the point of supply is a dedicated on-site substation
As a practical rule of thumb, many designers split that 5% allowance across the installation:
- Consumer Mains: ~0.5%
- Sub-Mains: ~1.5–2%
- Final Sub-Circuits: ~2.5%
On a standard 230V single-phase supply, a 5% limit equals 11.5V. On a 400V three-phase supply, it equals 20V. Convert the percentage to volts first. It makes checking your calculated result much faster.
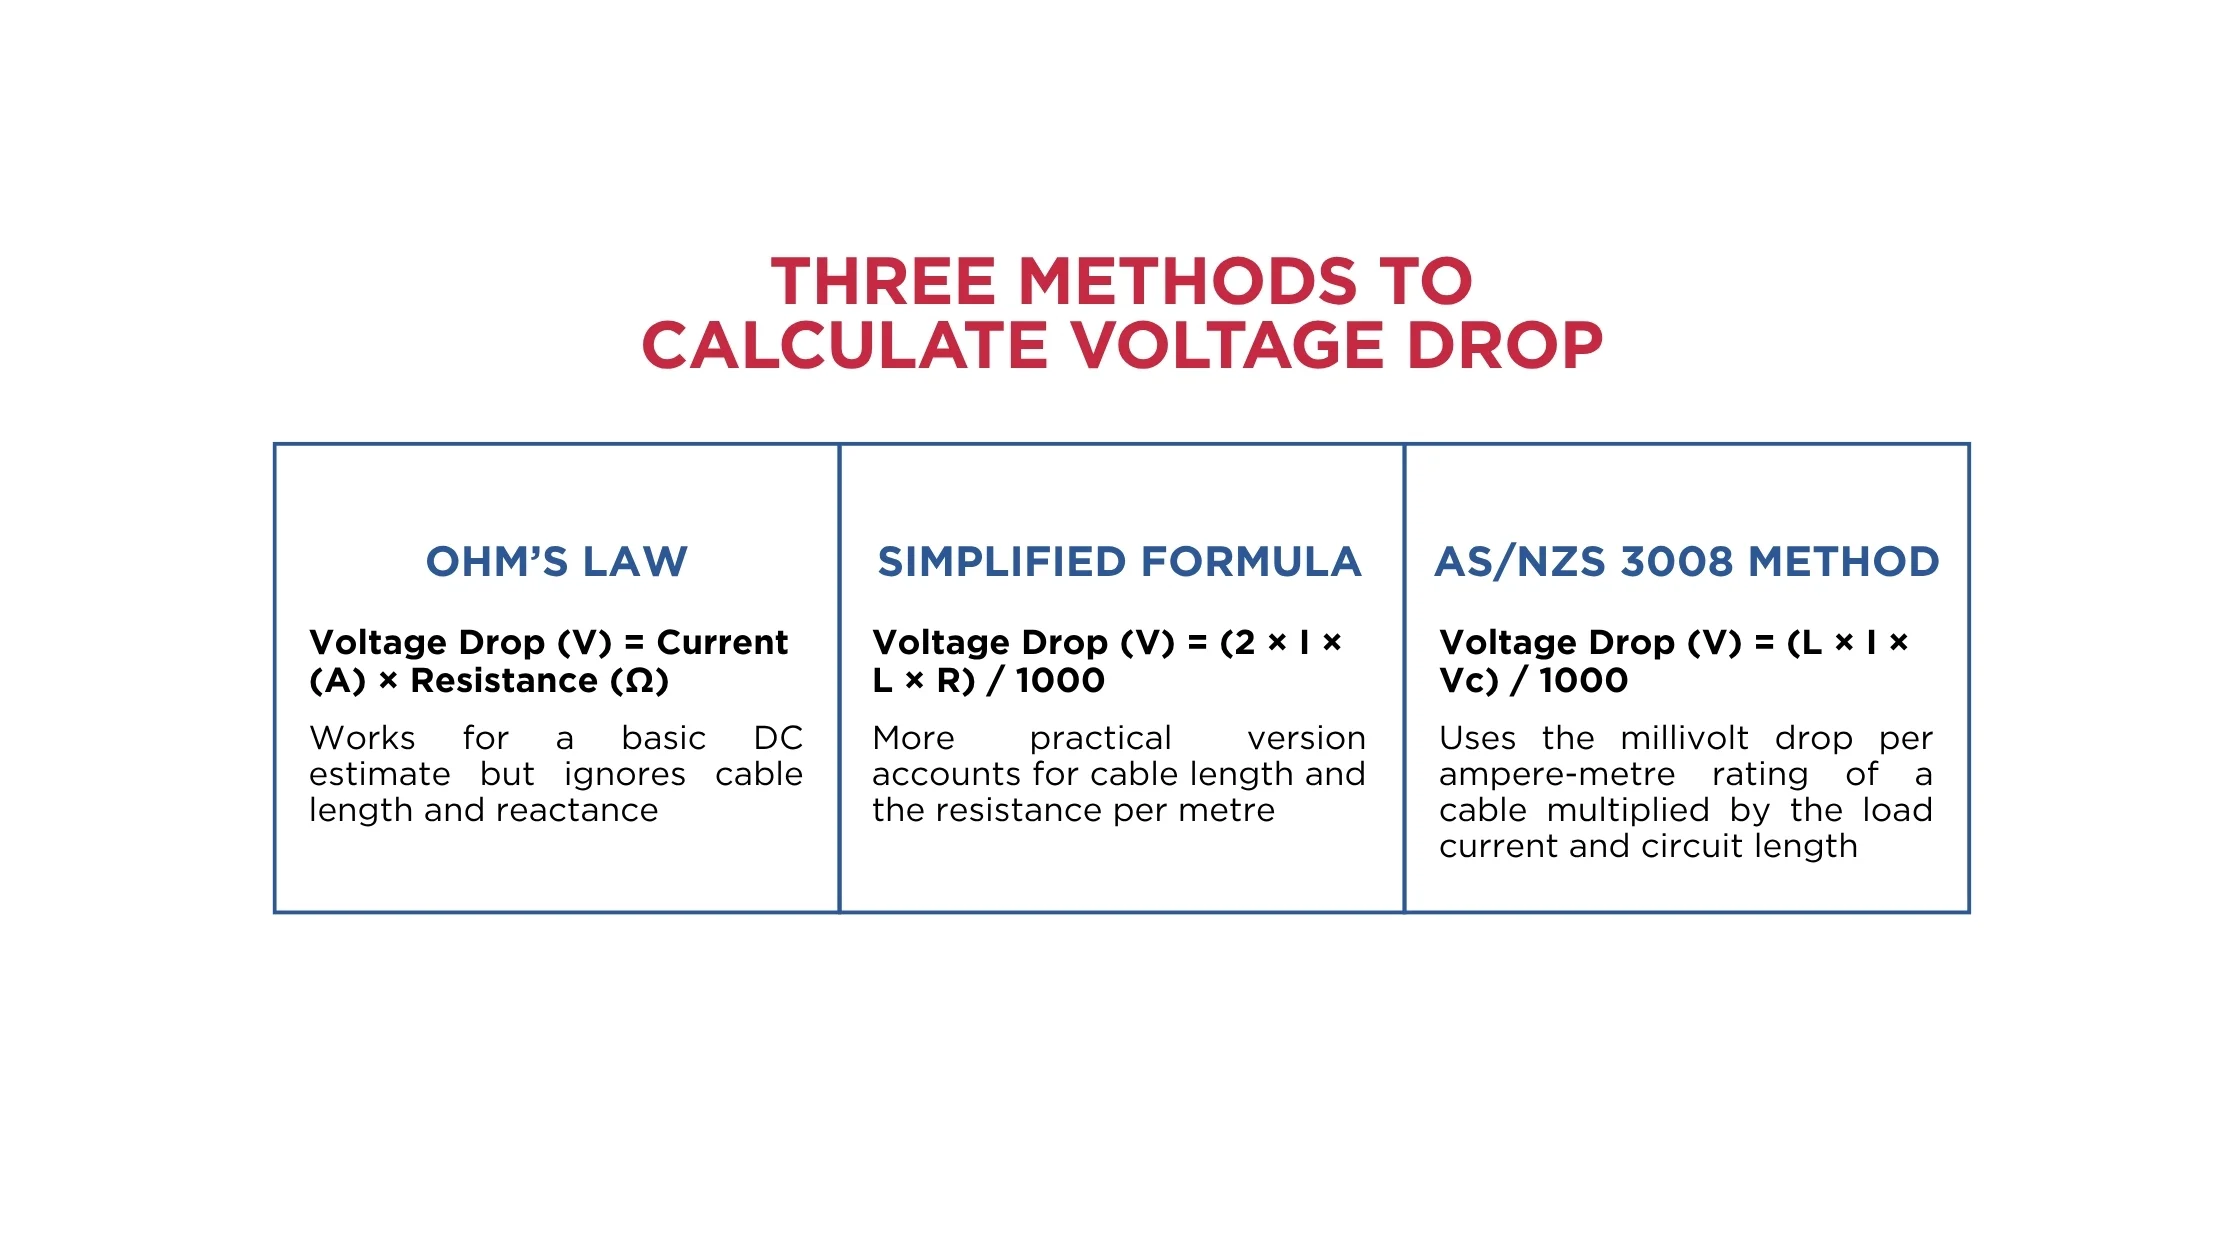
What Are the Three Methods in Calculating Voltage Drop?
There are three common approaches, ranging from a quick estimate to a fully compliant calculation.
Method 1: Ohm’s Law (Quick Estimate)
The simplest starting point is Ohm's Law: Voltage Drop (V) = Current (A) × Resistance (Ω)
This works for a basic DC estimate but ignores cable length and reactance, so it's rarely accurate enough for a real installation. Think of it as a sanity check, not a final answer.
Method 2: The Simplified Voltage Drop Formula
A more practical version accounts for cable length and the resistance per metre of the conductor: Voltage Drop (V) = (2 × I × L × R) / 1000
- I = Current in Amps
- L = One-Way Cable Length in Metres
- R = Cable Resistance in Ohms per Kilometre
The "2" accounts for the fact that current travels out through the active conductor and back through the neutral (a full circuit loop).
Worked Example: A 32A single-phase circuit runs 25 metres using a cable with a resistance of 1.2 Ω/km. Voltage Drop = (2 × 32 × 25 × 1.2) / 1000 = 1.92V. On a 230V supply, that's 0.83%.
Method 3: The AS/NZS 3008 Method (Most Accurate)
For compliant, professional cable sizing, you need to use the millivolt-per-amp-metre (mV/A·m) value from the correct AS/NZS 3008.1.1 table for your specific cable type, insulation, and installation method: Voltage Drop (V) = (L × I × Vc) / 1000
- L = Length of the Cable Run (Metres)
- I = Design Current (Amps)
- Vc = Voltage Drop Factor from the Relevant AS/NZS 3008 Table (mV/A·m
This method accounts for power factor, since Vc values are calculated using both the cable's resistance (R) and reactance (X): Vd (three-phase) = I × L × [√3 × (Rc × cos θ + Xc × sin θ)].
Because this factors in real-world power factor and reactance, it's the method that produces genuinely compliant results. It's the method AS/NZS 3008.1.1 itself is built around. It's also why manual calculation gets time-consuming: you need the right table, the right column for single- or three-phase, and the right correction factors for cable temperature.
Note: Single-phase voltage drop values from AS/NZS 3008 tables need to be multiplied by 1.155 if you're working from three-phase table values mixing this up is a costly error.
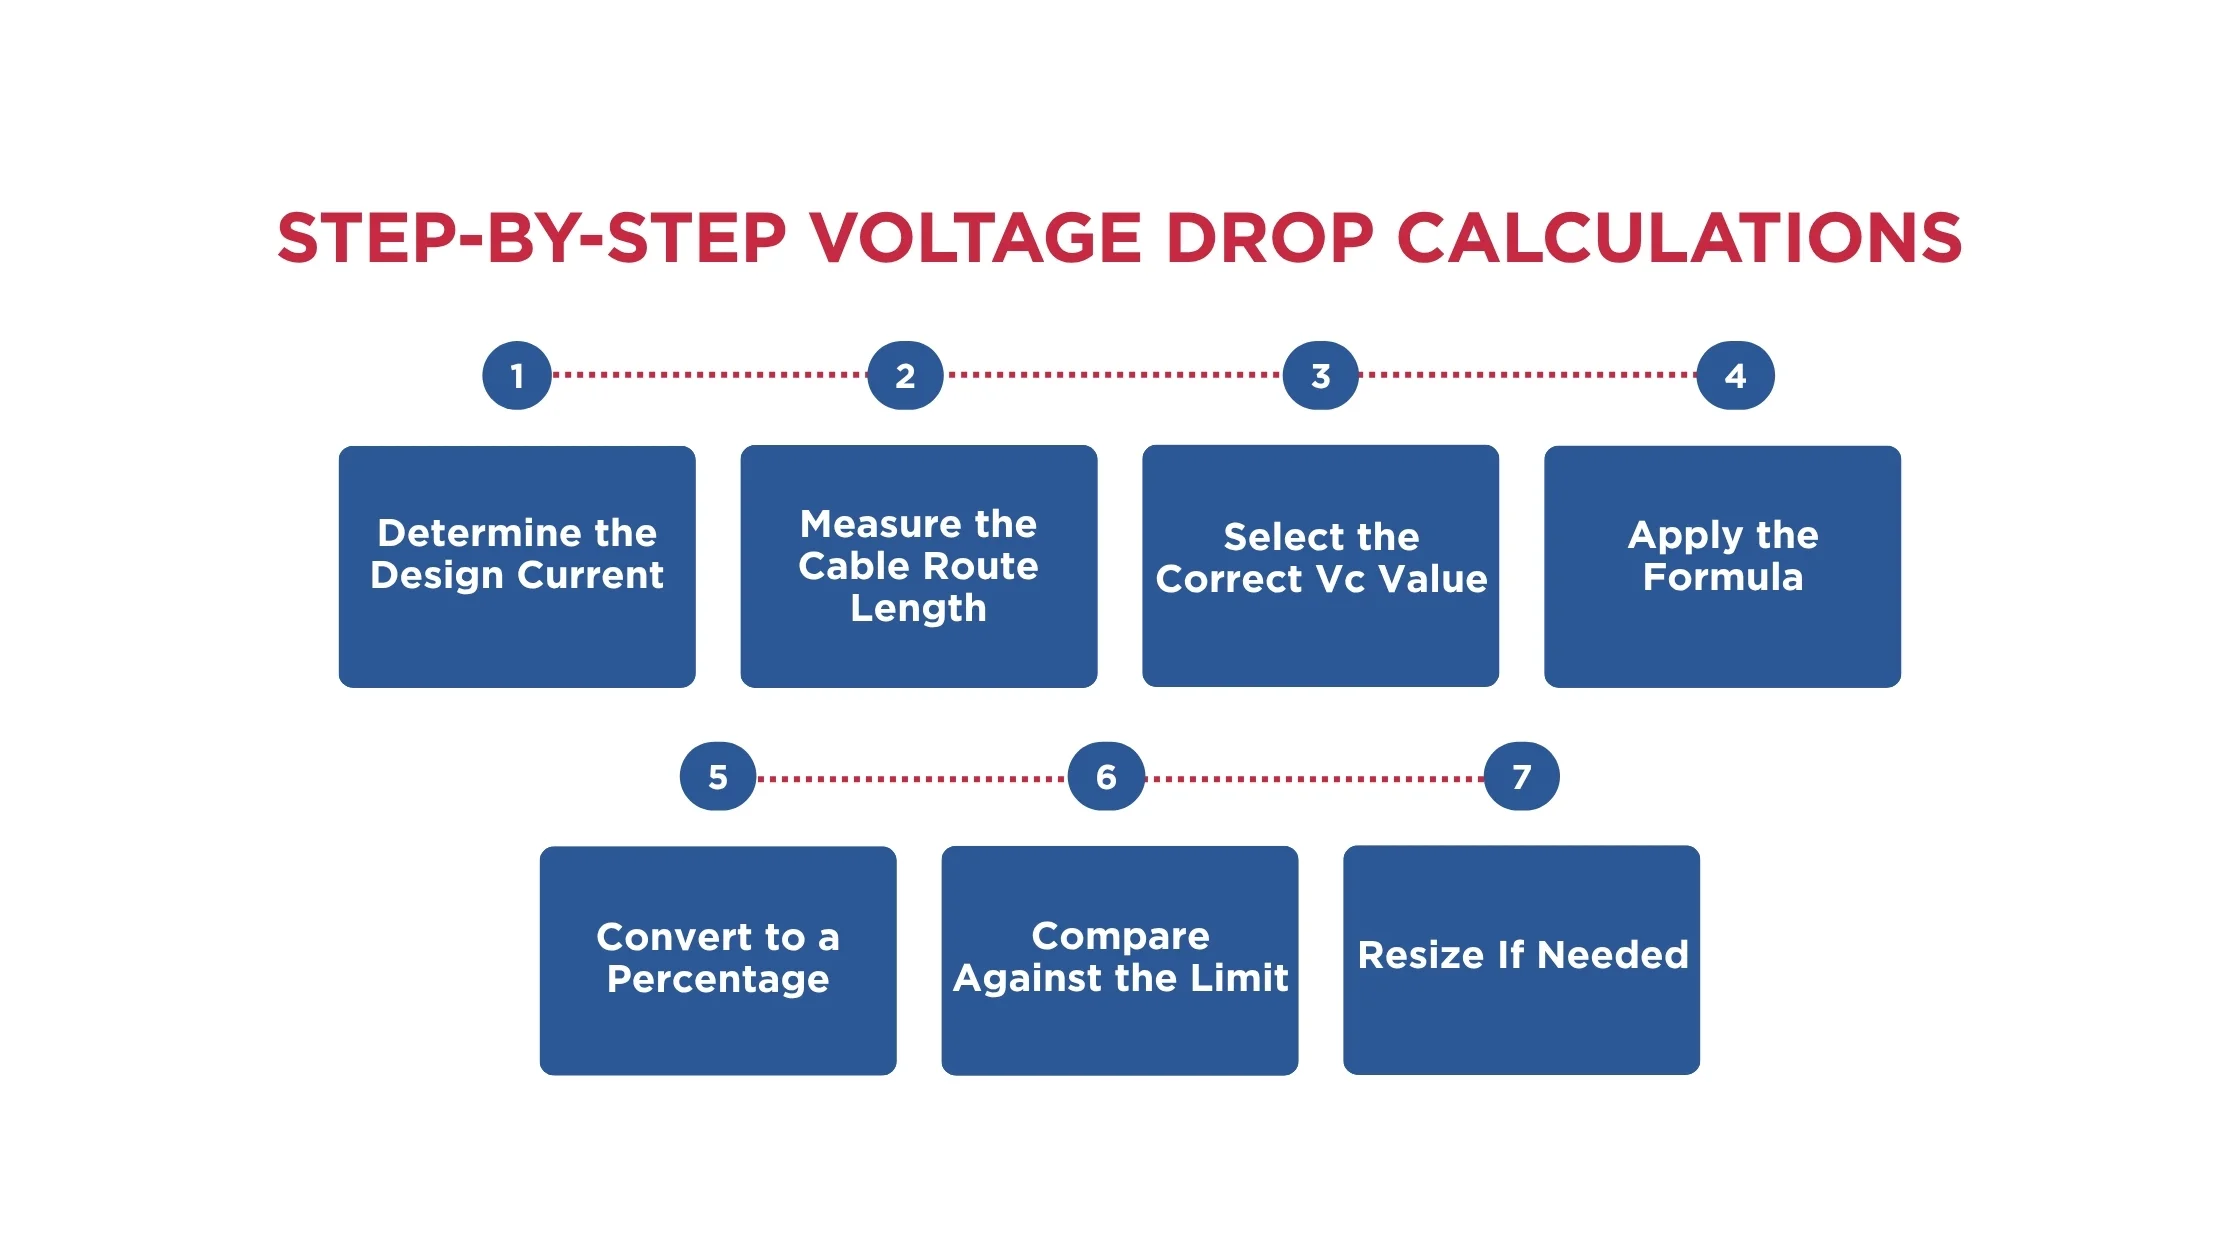
How Is Voltage Drop Calculated Correctly?
- Step 1: Determine the Design Current (I): Use the higher of the circuit's maximum demand or the protective device rating, per Clause 3.6.2 of AS/NZS 3000.
- Step 2: Measure the Cable Route Length (L): Use the actual one-way run, including vertical rises and detours, not the straight-line distance.
- Step 3: Select the Correct Vc Value: Pull the mV/A·m figure from the matching AS/NZS 3008.1.1 table for your cable's conductor material, insulation type, and installation method.
- Step 4: Apply the Formula: Calculate Vd = (L × I × Vc) / 1000.
- Step 5: Convert to a Percentage: Divide the result by the nominal voltage and multiply by 100.
- Step 6: Compare Against the Limit: Check the percentage against the 5% (or 7%) maximum under AS/NZS 3000 Clause 3.6.
- Step 7: Resize If Needed: If the voltage drop exceeds the limit, move up a cable size and recalculate. A larger conductor has lower resistance and therefore less drop.
Why Are Manual Voltage Drop Calculations Risky?
Doing this by hand means:
- Cross-referencing multiple AS/NZS 3008.1.1 tables
- Applying the correct derating and temperature corrections
- Getting the phase conversion right
One wrong table lookup or a missed correction factor can mean an undersized cable, a failed inspection, or a costly rework on site.
This is exactly the gap that purpose-built cable sizing software closes.
CableHero automates the full AS/NZS 3008.1.1 voltage drop calculation, so you get a compliant result in seconds instead of flipping through standards tables.
Calculate Voltage Drop Instantly with CableHero
Manually working through voltage drop tables is slow, and it's easy to make a mistake that costs you time on site or fails an inspection.
CableHero's cable sizing calculator does the full AS/NZS 3008.1.1 calculation for you, all checked against AS/NZS 3000:2018 in one go.
Whether you're sizing a single sub-circuit or a full switchboard schedule, CableHero gives you an accurate, compliant cable size in seconds, with a calculation report you can hand straight to a client or certifier.
Calculate voltage drop with CableHero for free.
FAQ
What is the formula to calculate voltage drop?
The most accurate formula is Vd = (L × I × Vc) / 1000, where L is the cable length in metres, I is the design current in amps, and Vc is the voltage drop factor (mV/A·m) from the relevant AS/NZS 3008.1.1 table. A simplified version, Vd = (2 × I × L × R) / 1000, can be used for quick estimates but doesn't account for power factor.
What is the maximum allowable voltage drop under AS/NZS 3000?
AS/NZS 3000:2018 Clause 3.6 limits voltage drop to 5% of the nominal supply voltage between the point of supply and any point in the installation, or 7% where the supply comes from a dedicated on-site substation.
Does a bigger cable always reduce voltage drop?
Yes. Increasing the cable's cross-sectional area lowers its resistance, which reduces voltage drop for the same current and length. This is why voltage drop calculations, not just current-carrying capacity, often determine the minimum cable size on longer runs.


 Cable Sizing